Assuming you already have Kali Linux running on your machine this is a rundown of how I take the MAC address and change it in Kali Linux. MAC stands for Media Access Control. Every single device comes with one and no two devices in the world have the same MAC address. There is always a source and destination MAC address. The reason we have to go about changing it is because it will give us anonymity when we are carrying out our hacking operations. It will also allow us to impersonate a device which can make it possible for us to bypass filters, while hiding our identity. The process is rather straightforward and easy.
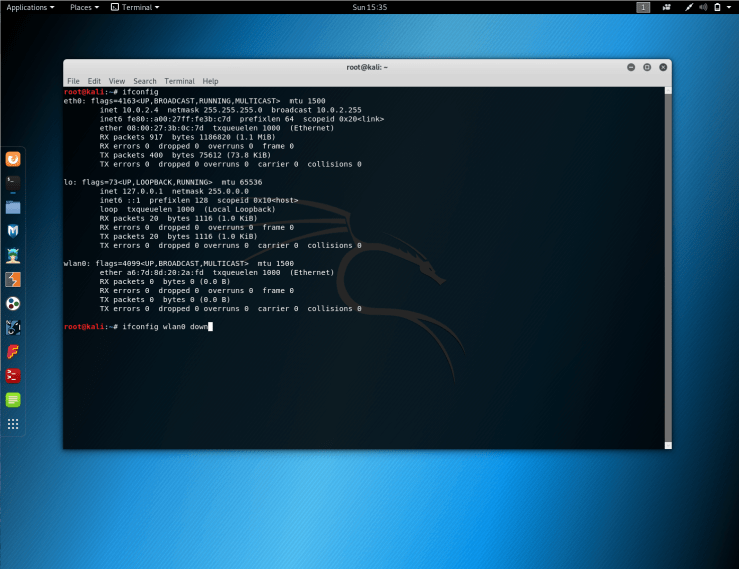
1. The first step would be to open your terminal in Kali Linux and type “ifconfig”. This will show us all the network interfaces.
2. Within this step there a number of things we have to pay attention to. First, if we look at the “wlan0” we see that “ether” defines the current MAC address for the virtual interface. Obviously, we’re trying to change it. The reason it’s “wlan0” and not “lan0” is because I have a wireless adapter (Atheros) connected to my machine.3. What we’re doing in this step is taking our “wlan0” (interface) offline. This will essentially disable the network before we make any changes to its MAC address. After pressing enter, the command will execute properly and the prompt “root@kali” will appear once again.
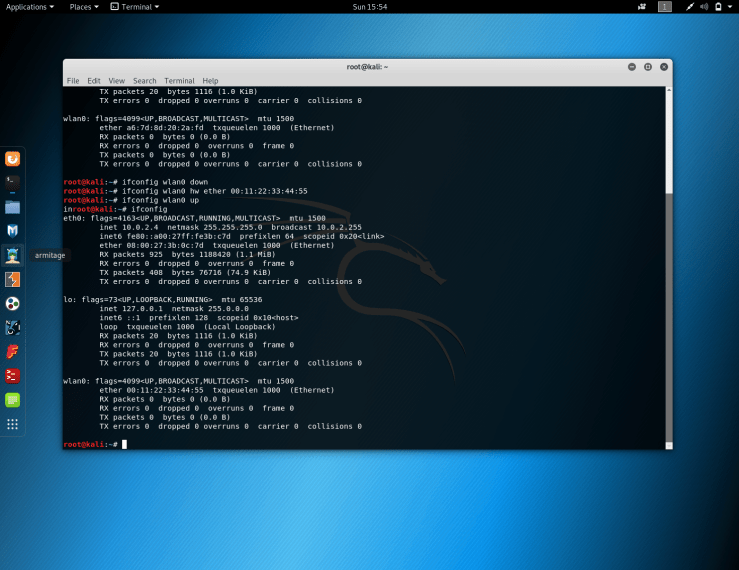
4. Alright. So now that we disabled our “wlan0” interface, we’re able to go ahead and change the MAC address. We simply type “inconfig,” followed by the interface which is “wlan0” in this case. After that, we specify the further options we want to change which include the hardware (hw) and then ether (indicates MAC address), followed by a made up MAC address. In the screenshot above, I specifically highlighted the MAC address we are changing for those who may not be sure. One thing to always remember, is that the new MAC address must always start with “00” in order for the command to execute properly.5. After putting in our new MAC address the we are required to bring the “wlan0” interface back online. So for that we simply type, “ifconfig wlan0 up”. The command should be executed without any issues and we should have a new MAC address. To double check to see if it actually worked, we can simply type, “ifconfig”. We just need to glance down at the “wlan0” “ether” to see that our new MAC address has shown up.
Now when we use the interface, this MAC address will be visible. The MAC address will revert back however once the computer is restarted. We’re only changing the MAC address in memory. We didn’t actually change the physical MAC address.