For those who are reading and do not know what Microsoft Azure is, it is a cloud computing service that Microsoft has created. It is very powerful and can be used for building, testing, deploying, and managing applications and services through Microsoft-managed data centers. Azure’s set of cloud services help organizations meet their business challenges. Azure allows architects and engineers to develop applications on an ever-expanding global network with powerful tools and frameworks. I want to briefly go over one of the most straight forward things to do in Azure, which is creating a Windows Server VM (Virtual Machine).
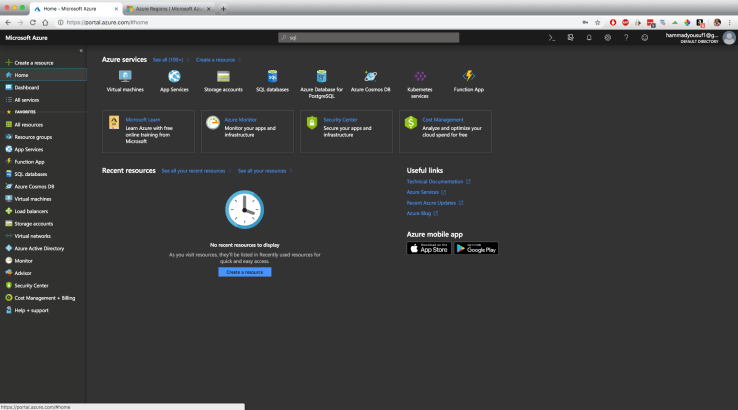
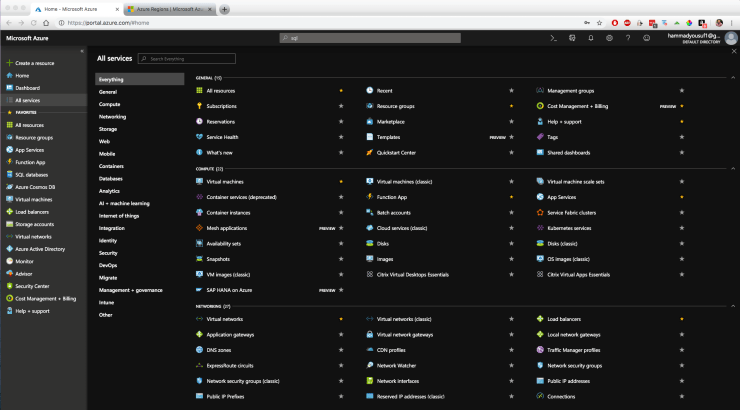
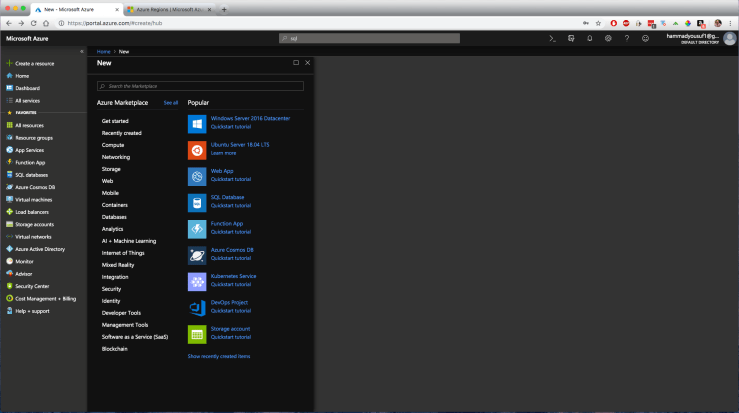
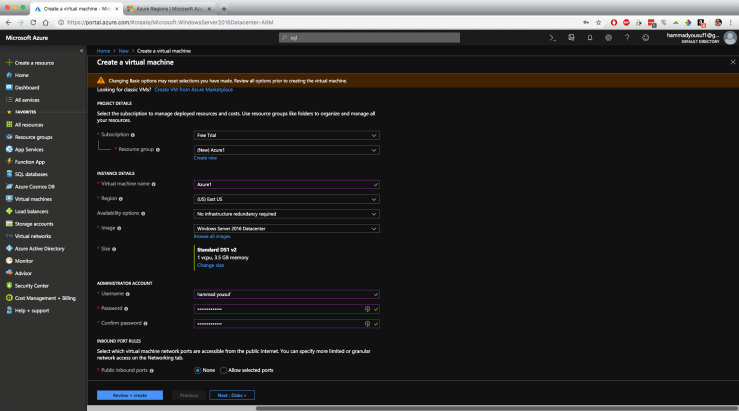
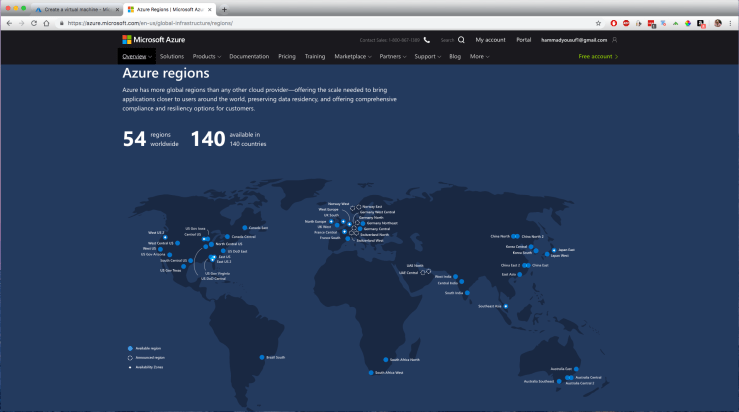
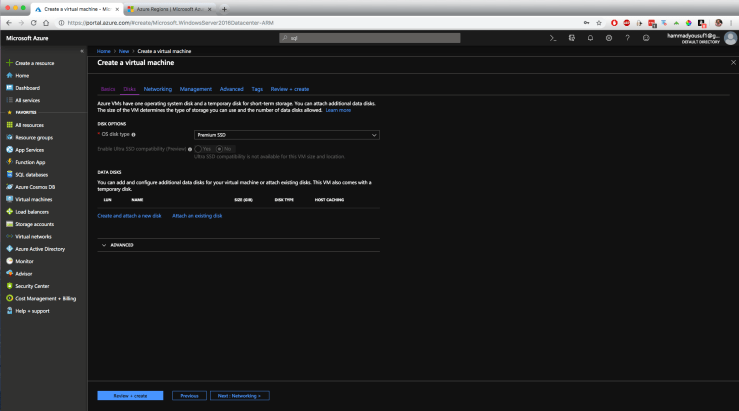
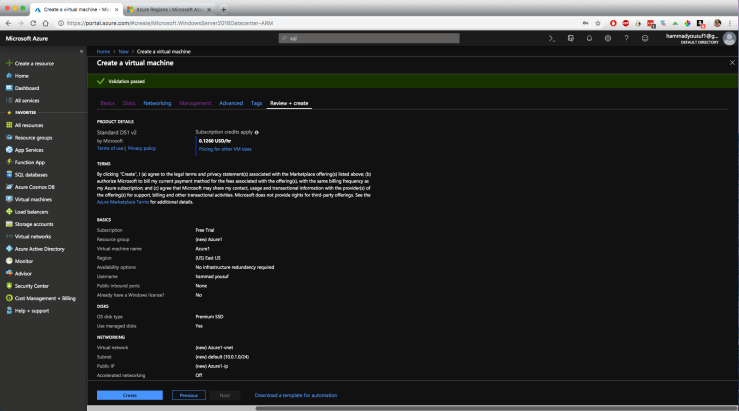
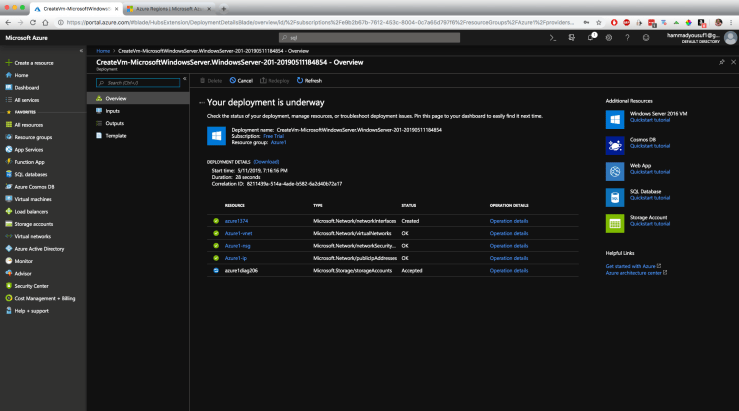
1A. The first step is to start at the home screen in the Azure dashboard. Just a quick intro to the dashboard itself, it shows some of the services on the top that I have access to. There are more than 100 services that are available in Azure.1B. To view all the services, I had to just click “See all (100+)” next to the Azure services heading. This list can get really exhaustive. Azure incorporates non-Windows services as well. Some Linux services can be found here as well which again go to prove that Azure is very versatile. After exploring through this, we need to get back to creating our Windows Server VM. For that, we can navigate on the left toolbar to the first link titled, “Create a resource.”2. Here, I am able to see just some of the resources that I am able to create. Today, I am just creating the Windows Server VM. For creating that, you just need to select the “Windows Server 2016 Datacenter” which is the first one under the “Popular” heading.3A. Once you click “Windows Server 2016 Datacenter” you will be directed to this page which will give you the options of how you want to create the VM. It will ask for “Subscription” which will automatically be the one you are under. In my case, I am on the “Free Trial” subscription. The “Resource Group” is a container we want to deploy into. So for this example, I titled my Resource Group “Azure1”. After that, you can go ahead and name the Virtual machine which is under “Instance Details.” For this example, I titled my Resource Group and VM the same thing. After that it gives you the option of where you want to deploy. It’s set to the default “East US.” I actually want to digress a bit after this step and show the Azure regions as they are very helpful in larger operations. For the rest of the options we can leave them at the default setting today. For the administrator account you can go ahead and create whatever you want. Everything else can be left to the default options. We can then go ahead and click, “Next: Disks >” for the next step.3B. This is the side note about Azure regions. This page can be reached at https://azure.microsoft.com/en-us/global-infrastructure/regions/ . This shows the various Azure regions that can help me decide what region is best for me to deploy in. The regions are basically a set of datacenters that are deployed within a latency-defined perimeter and are connected through a dedicated low-latency network. Azure has more global regions than any other cloud provider which gives customers the flexibility to deploy applications where they need to. You might be wondering what “Availability Zone” means? These are zones with multiple datacenters that provide low latency failover and high availability in the event of data center outage. Azure regions can be used for business continuity and disaster recovery sites (Something I contributed to at Network for Good when we were constructing the warm site with the help of the .NET developers.)4. This will show me the Azure disks. If i need to I can add more disks as well. For today, we’re good though. After this we don’t need to go through all the advanced options in Networking, Management, etc for just simply creating a basic Windows Server VM. We can click “Review + create” to proceed to the next step.5. “Review + create” will direct us to this page where we can see the specifics of the VM we’re about to create. This shows the hourly rate for how much it’ll cost to run this VM along with all the settings we went through in the tutorial. After reviewing all the specifics we can hit “Create”6. Now we can go ahead and view our deployment and can see how it’s being executed and created. To track the deployment progress, you can click the bell icon in the top toolbar which will let you know when your deployment is successful. To view your VM you can go into the “Resource Groups” tab on the left toolbar and find it.