Microsoft Azure 3: Creating and Configuring Azure Storage Accounts
So a quick overview of what Azure storage accounts actually are. An Azure storage account is a secure account that gives you access to services in Azure Storage. The storage account provides the unique namespace for your actual storage resources. A key thing to remember, is that storage account name should always be unique across all existing account names in Azure.
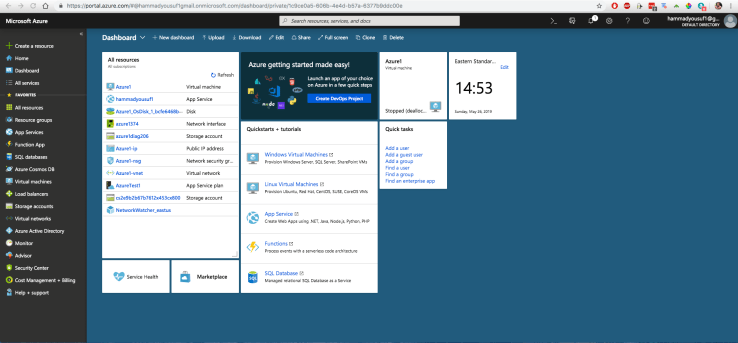
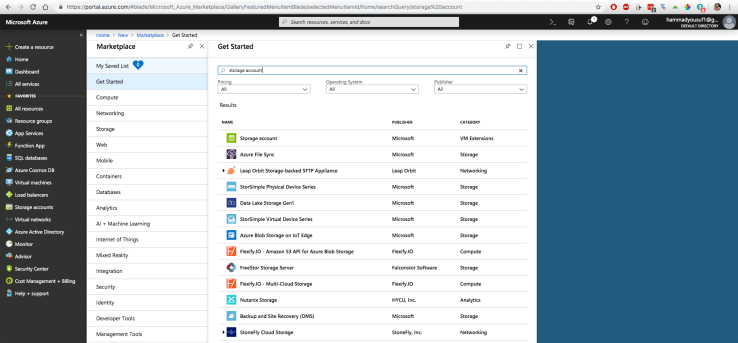
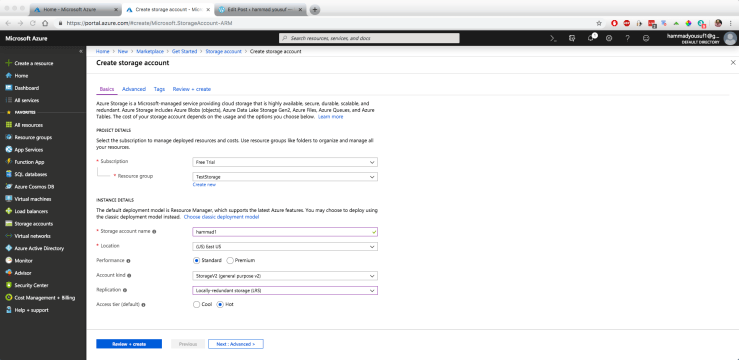
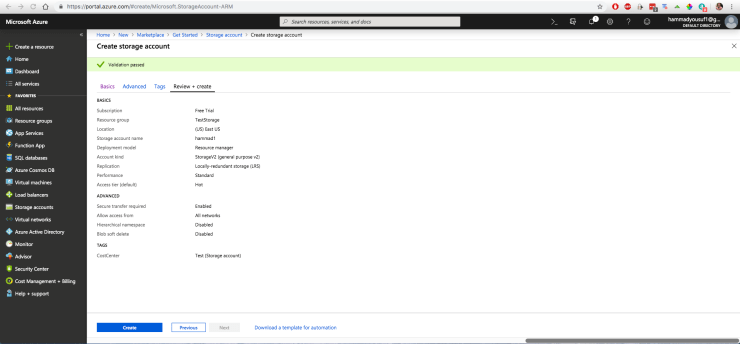
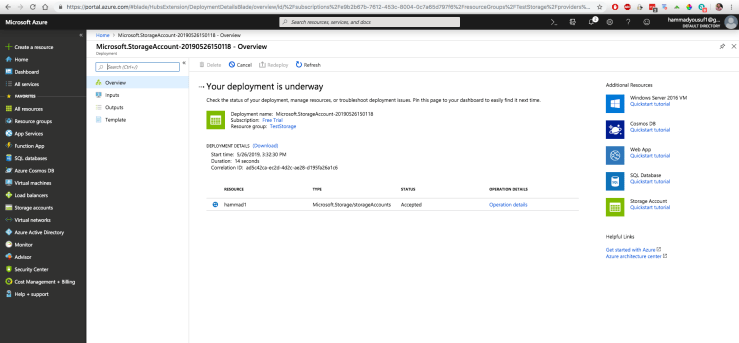
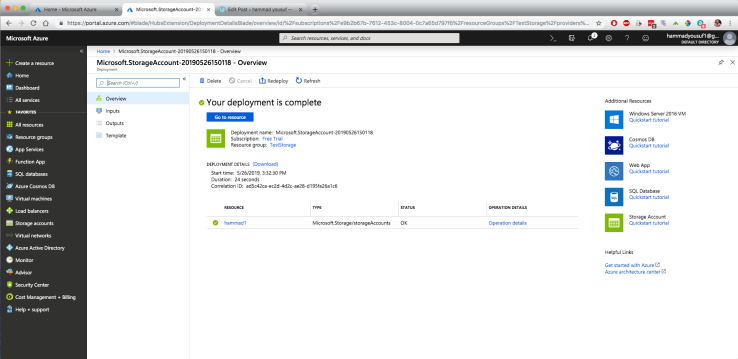
1. So for creating the storage account, I’m starting off right here at my dashboard.2. To create the storage account, we had to select “Create a resource” in the top left of the left toolbar. When we arrive at that screen we can search the Azure Marketplace for “storage accounts” and for this example, we’re going to be using the first option that shows up3. Simply hit the blue button that says, “Create”4. Now we’ve reached the stage where we can decide all the specifications for our storage account. For my subscription, it’s still the “Free Trial” version, and the resource group I’ve decided to use in this case is a new one that I created called “TestStorage.” So the storage account name is one that has to be unique across Azure, so in my case I titled it “hammad1.” Location is set to East US since that is where we’re based and account kind is “StorageV2 (general purpose v2).” Since this is only for test purposes, I changed my replication spec to be “Locally-redundant storage.” The last specification is defining the access tier. In my case, I have decided to select “Hot” for the access tier. The main differences between “Hot” and “Cold” revolve around how frequently data is accessed. If we select “Hot” that means that our data will be accessed more frequently which in turn means this access tier is more costly. The “Cold” access tier is optimized for storing data that is infrequently accessed and is stored for at least 30 days.5. Here we’ll be able to define some of the advanced specifications in security, networking, and data lake storage. In terms of security, it gives us the option to select whether we want “Secure transfer required,” or not. We’re going to enable that so that only connections from certain networks or certain IP address ranges are allowed to connect to this storage account. Configuring the security policy will most likely be in a different tutorial so we don’t have to worry about that right now. The last option we can check off as “Disabled” since we’re not going to be using this for data lake storage purposes. After all that, we can go ahead and hit “Next: Tags >” to proceed to the next step.6. This step will allow us to provide tags to classify our resources into certain filters. So in this case, I titled the key, “CostCenter” and the value “Test”. After that, I can go ahead and hit “Next: Review + Create >”7. Alright, so we’ve made it this far and the “Validation passed” notification should appear at the top signaling our elements are okay to deploy and create. At this stage, we can review all our specifications and elements and make sure that we have everything set to how we want when we deploy our storage account. Once everything seems okay, we can hit the blue button that says, “Create” at the bottom!8. Deployment is underway :)…Moving on to the next step!9. Okay, so after a couple seconds the deployment is complete and we’re redirected to this screen. If we want to further configure the storage account we can hit the “Go to resource” button.10. Over here we’re able to see all of the elements that make up our storage account. The access tier, performance, replication, account kind, location, tags, etc are all available to be seen. The next part of the tutorial will just be going through some of the various configuration settings in the storage account dashboard.
Configuring Azure Storage Account
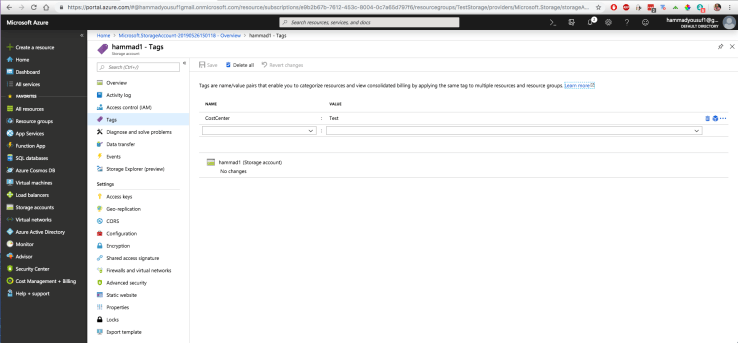
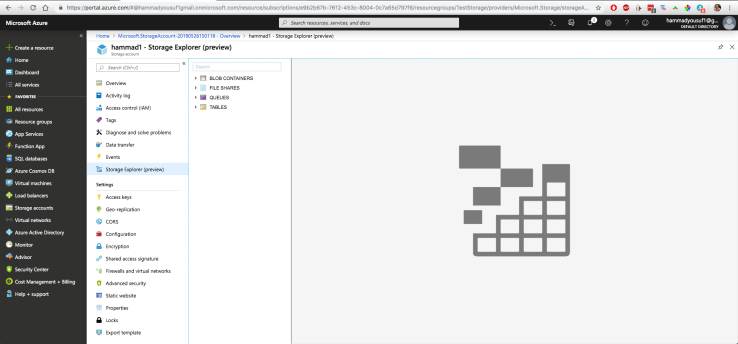
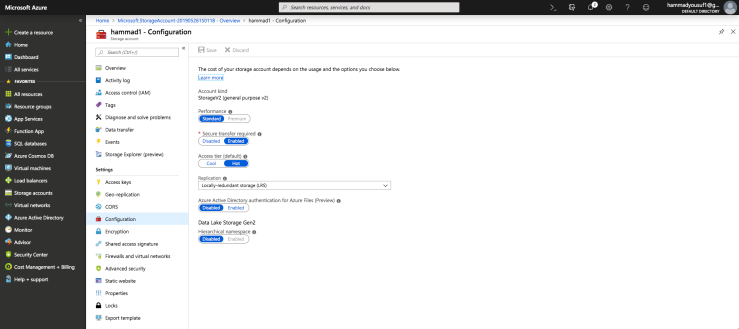
11. I clicked on the “Activity log” under the overview. Activity logs are available for every resource in Azure and it basically provides is a log of activities that have been carried out on that specific resource.12. “Access controls” are where we can delegate access to this storage account for different users. Later on, when I do a tutorial about security, I’ll discuss this in more detail.13. “Tags” are where we can provide additional tags to the resource group or modify the existing one.14. The “Storage Explorer” is where we can explore all the data that is residing in the storage accounts. There is a desktop version of this storage explorer as well which can be downloaded.15. “Access keys” is a very important setting that is used by developers to develop apps which will access the data within the storage account. Access however, shouldn’t be openly granted, rather generating SAS (Shared access signature) keys which can be generated in this dashboard as well. Access keys should in actuality be only given to the person who actually made the storage account.16. The “Configuration” tab will open up our elements that make up our storage account. These are able to be changed of course if we navigate to this tab. Certain things however, such as performance type cannot be changed.
There are some configuration settings I didn’t describe. Feel free to go ahead and explore them on your own. In later tutorials, I do plan to go over some of the other configuration settings so I will most likely touch on them in the future.